# Update the firmware with RL-programmer on Windows with STM3CubeProgrammer
# Step 1. Download firmware
Download the latest firmware from Update the firmware page.
# Step 2.1. Install software
Install STM32CubeProgrammer (opens new window) to the default directory.
This tutorial is based on stm32cubeprg-win64-v2.15.
# Step 2.2. Connect the programmer
TIP
Be sure that your SWD pins on the node and the needle sides are connected correctly (3.3 to 3.3, GND to GND).
Prerequisites are:
- RL Programmer-Sniffer,
- SWD-NEEDLE (opens new window),
- JST-GH 4 cable.
An example of a connection is shown below.

TIP
SWD and CAN sockets look similar and they use the same 4-pin cable. SWD has 3.3V, but CAN has 5V. Don't mix them up.
TIP
On the RL programmer VUSB led should be orange, 3.3 led should be red, ST-link led should be blue, and blink led should blink with yellow. If they are not, probably you are making something wrong. It also may indicate that the board works incorrectly.
# Step 2.3. Upload the firmware
It is expected to use STM32CubeProgrammer (opens new window).
Open
STM32CubeProgrammer.Connect the programmer to the PC via USB and target device to the programmer via SWD connectors as shown on the
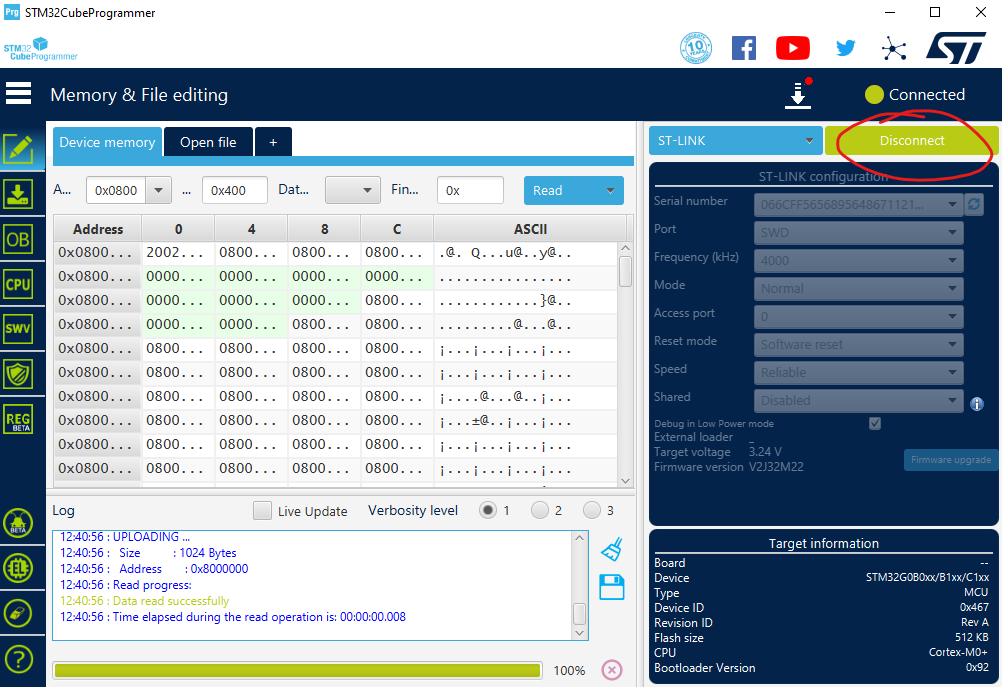
Step 3. Connect the programmer.Press
Connectbutton, you will see correspondingTarget information.Error: No debug probe detected. The programmer is not detected by your PC.Error: No STM32 target found!. The programmer is detected, but the node is not connected to programmer. It may refer to bad SWD connection between needles and the node. Try to slightly push the needles or change the connection angle.Error: Unable to list supported devices. Can't identify the device!. This error was reported once. It was gone after reinstalling the STM32CubeProgrammer software from custom to the default directory.If everything is fine, you will see the following:
Press
Open fileand choose firmware binary to be downloaded on chip. It should be the firmware binary that your downloaded inStep 1. Download firmware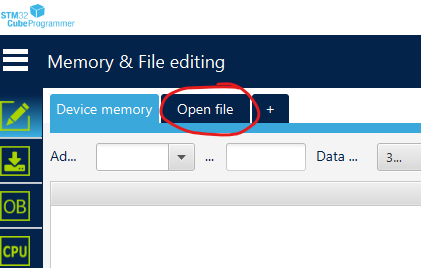
Press
Download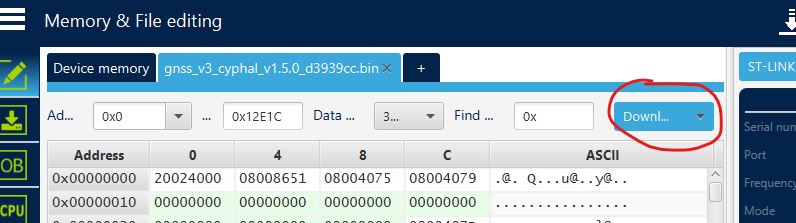
Reconnect the node
At that point, the firmware is succesfully downloaded. You can verify the software version by using gui_tool.
TIP
Its also possible to upload firmware using STM32_Programmer_CLI.exe
STM32_Programmer_CLI.exe -c port=SWD -d "<PATH_TO_FIRMWARE>\cyphal_example.bin" 0x08000000