# 7. U-Blox module setup
You can either rely on automatic ublox configuration or perform it manually.
# 7.1. Automatic configuration
Wtheter to run the ublox configuration or not is defined by the corresponding gnss_config parameter that exists on both Cyphal and DroneCAN software.
You have 3 options:
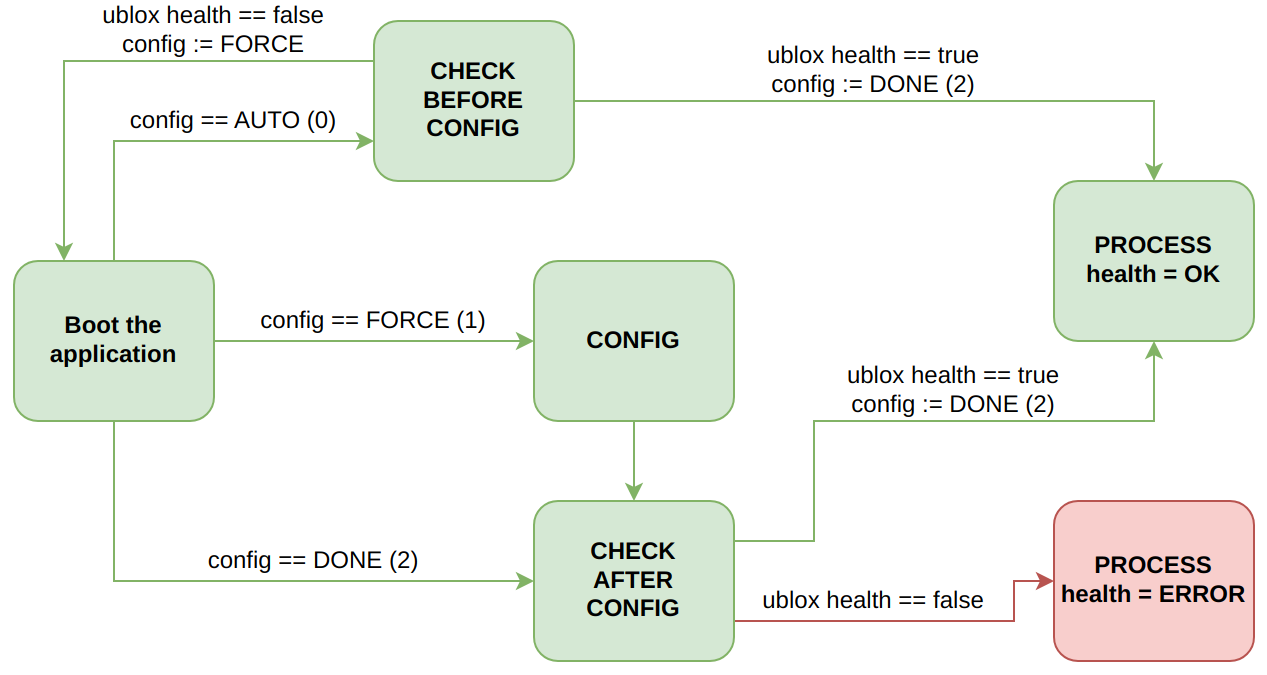
- (By default) AUTO. The node is shipped with this mode by default. It check input data from ublox for 3 seconds. If data is appeared, it will set
gnss_config=2(DONE), save parameters and continue working in the normal process. Otherwise it will setgnss_config=1(FORCE), save parameters and reboots. - FORCE. In this mode the device will always starts with the configuration process. If the configuration is successfull, it will set
gnss_config=2(DONE), save parameters and continue working in operational mode. Otherwise, it will continue work in ERROR mode. - DONE. After the successfull configuration you will be always in this mode only. The node skips the configuration and goes to the operational mode immediately. If at some point of time the frequency is less than 1 Hz, it will set ERROR health.
The state machine of the node is shown below.
For LED meaning info, please check LED indication standard page.
In most cases the automatic configuration is enough.
If something goes wrong, you can always repeat the ublox configuration in force mode.
# 7.2 Python script
This script (opens new window) checks all the necessary packets and configures them as they should be. Just copy the repo and install the dependencies:
pip install pyubx2
pip install pyserial
Then run the ubx.py -s <serialport> script.
# 7.3 Manual setup with u-center
For GNSS module setup u-center (not u-center 2) can be used, it can be downloaded from the official website (opens new window).
Desription of UBX protocol is presented in UBX-13003221 (opens new window) document.
The description can be found in the Integration Manual (opens new window) on page 109, section C.2, but in our case it needs to be modified slightly.
- Install u-center (not u-center 2).
- Connect to the module by UART at 9600 by default.
- Open View->Configuration view.
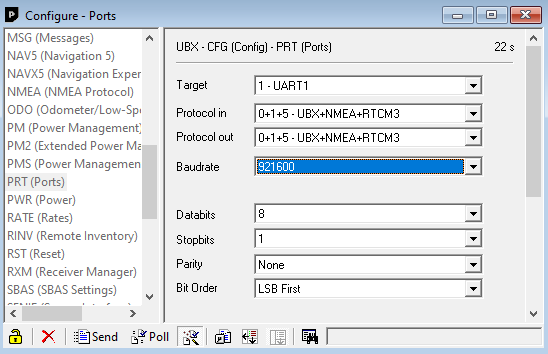
- Choose PRT(Ports) and set up Boudrate to 921600, Press send.
- Choose NAV5 (Navigation 5) and set up Dynamic model to 7 - Airborne < 2g.
- Choose TP5 (Timepulse 5) and set up period to 100000 us and length to 50000 us.
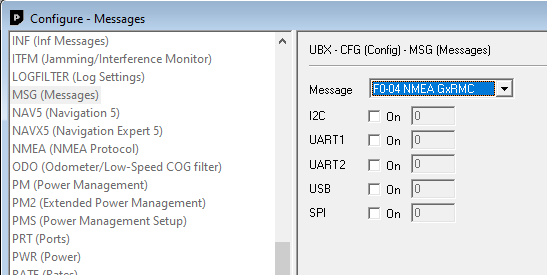
- Disable all NMEA frames: GGA,GLL,GSA,RMC,VTG - by unchecking all ports and press send.
- Enable next UBX frames:
- UBX-MON-HW (0x0a 0x09)
- UBX-NAV-COV (0x01 0x36)
- UBX-NAV-PVT (0x01 0x07)
- UBX-NAV-STATUS (0x01 0x03)
- UBX-TIM-TM2 (0x0d 0x03)
All the frames used can be found in the Interface Description (opens new window).
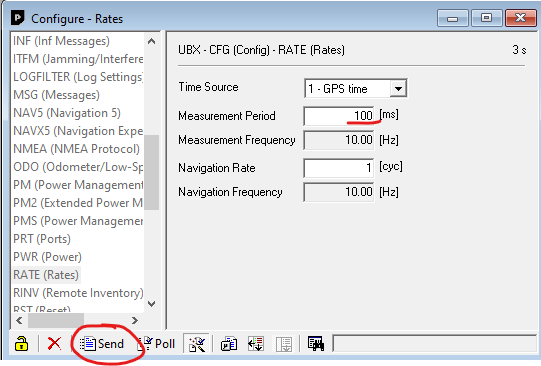
- Choose RATE (Rates) and set up as shown in the figure below
- Choose CFG (Configuration) and Save current configuration by pressing send.